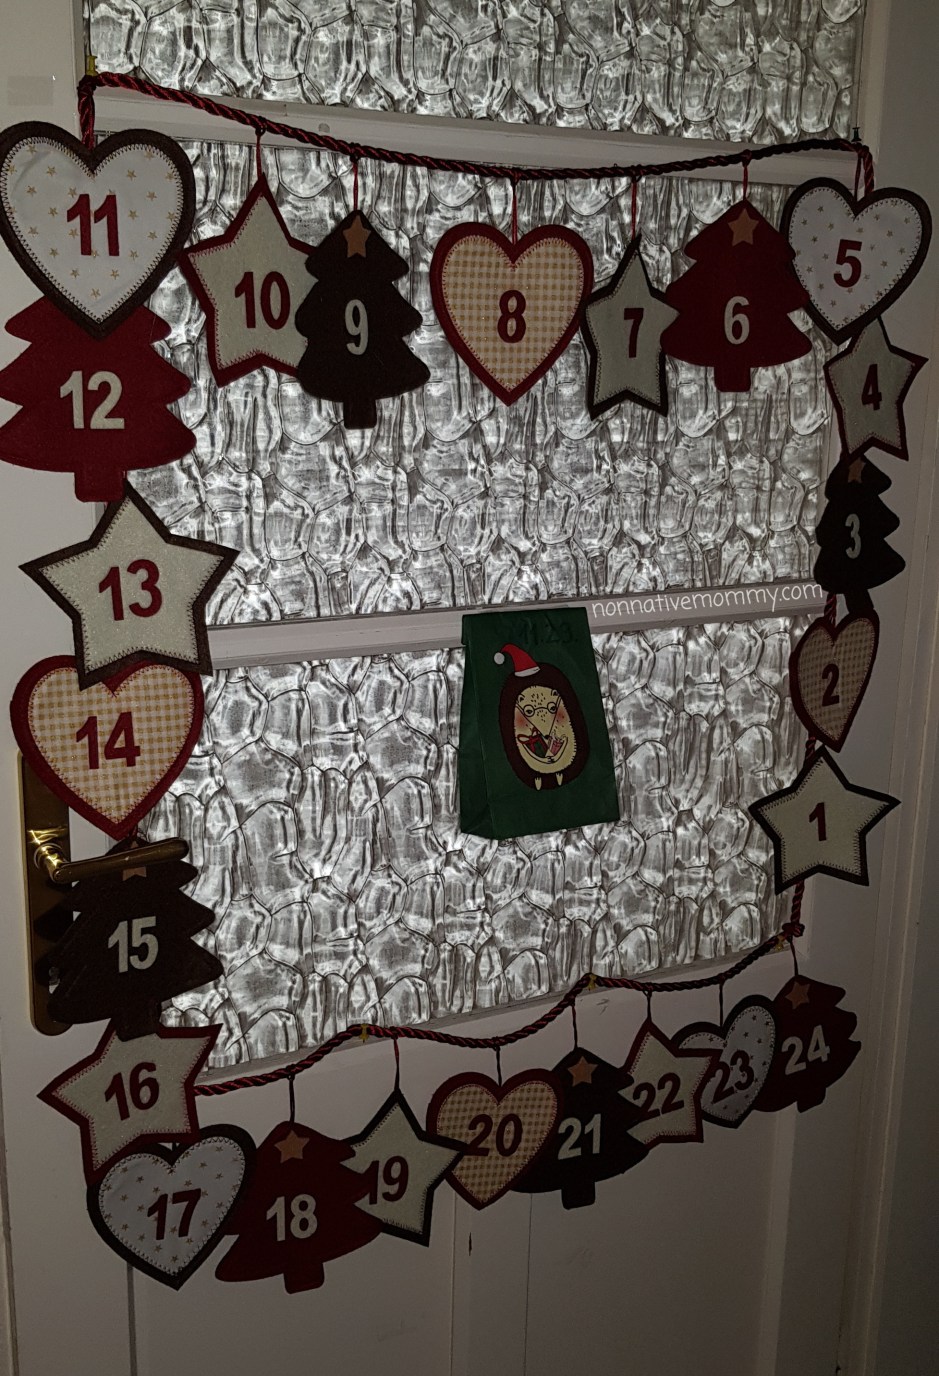
The Advent Calendar opened on 29 November when we we lit the first candle on our Advent wreath. The kids were worried that the Angels would bring the calendar only on 1 Dec but they didn’t. On 29 November the Calendar arrived nicely put in the shape of a square, just as the girls had asked for.

I know this post is about December but this year the beginning of Advent is a bit early. The calendar hid some fluffy marshmellows and some sticks so we fried our marshmallows placed above the first advent candle.
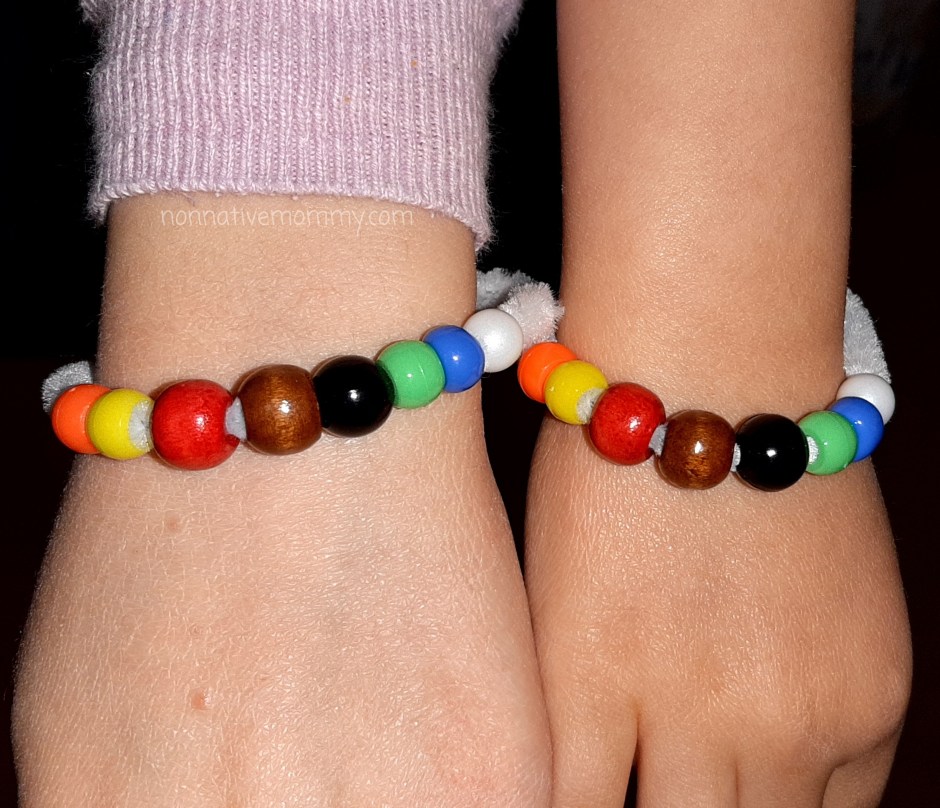
The second advent presents were headbands on 30 November. E. took hers to school. Little L was a bit disappointed that they didn’t open them together.
It was funny to see that another cat (the kids call him Mitsy) took over our cat’s outside winter home that we’d built at the weekend.
On 1 December we got a note from school which said the school was closing down the next day due to the pandemic. Quite a few teachers had got infected and substitution became chaotic.
We were quite relieved to hear the news as every day it was rather nonsense to send E. to school while we had been home for more than 2 weeks (home office).
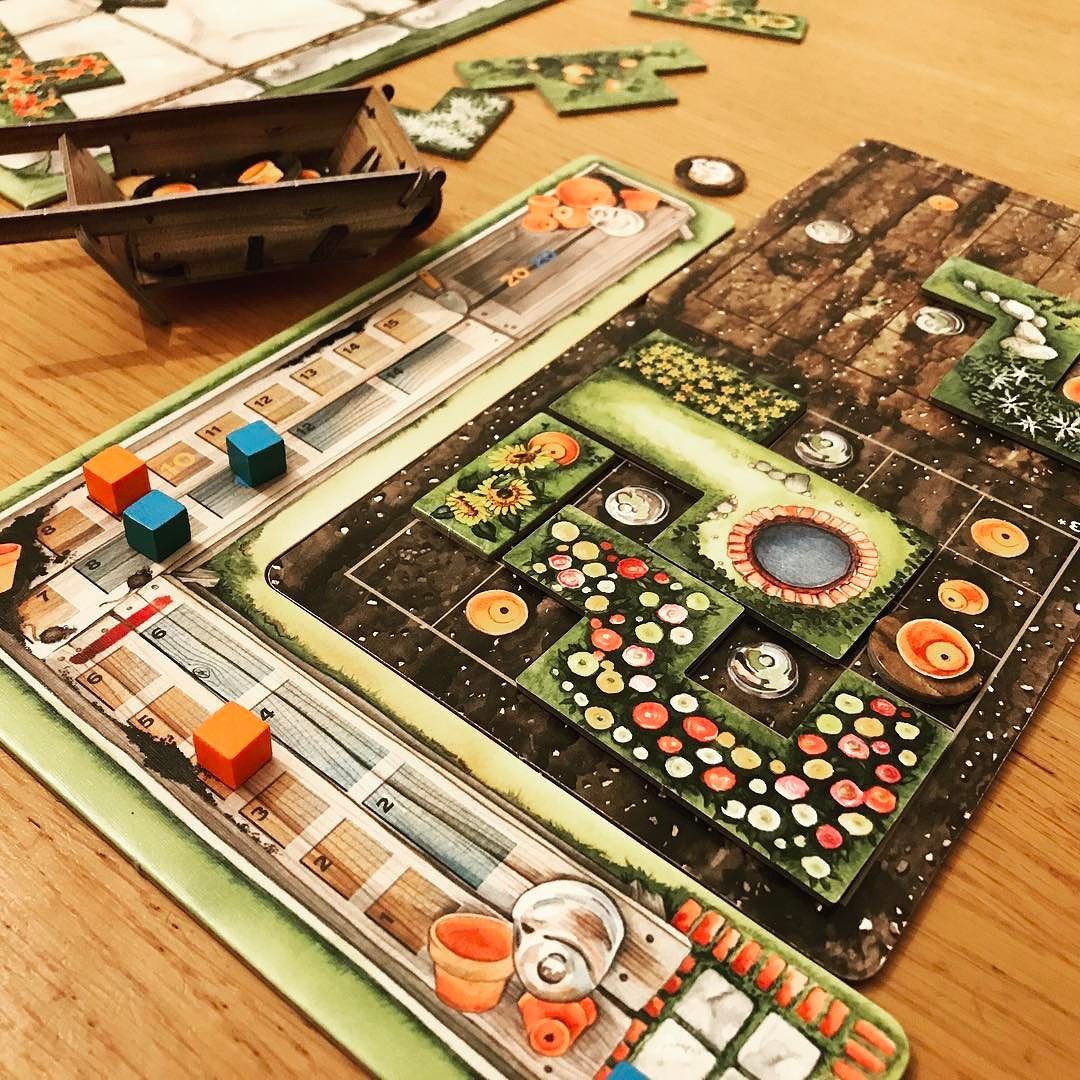
We sat down to play Daddy’s new board game that he got for his birthday: Cottage garden.
2 December
The Angels hid little stamps in the calendar. Suprisingly they did not appreciate them so much. (I guess they have a lot of stamps and ink pads). Still, they said thank you for them.
The morning was about digital education, cooking and playing. Daddy read a lot of stories to Little L in Hungarian snuggling on the sofa upstairs. In the meanwhile we were doing school work downstairs with E.
After lunch we looked through E.’s English workbooks (English, Maths, Reading and Writing). Although E. wasn’t very impressed, Little L came to me to check the activities. I was pretty surprised she could do some tasks from the workbooks designed for 7-8-9 year olds. In the meanwhile E was playing with her Lego (partly in English partly in Hungarian)


In the afternoon we could try a new game that we borrowed from our board game fan neighbours: 80 days around the world.
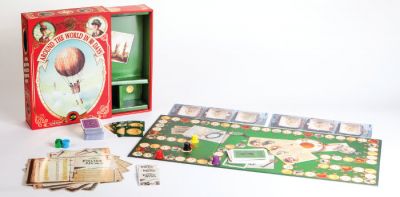
E. could practise her counting skills. Little L helped me move the counter on the board. When she had enough of it, she went to play with Teach your monster to read on my phone.
The girls found the Christmas books and E. read some storied to Little L. but they refused to tell me which ones.
3 December
The girls found big 3-D stickers in the Advent Calendar.
We made afternoon snack time a family happening. We all sit down to eat fruit and biscuits and chat about anything that the kids come up with.
4 December
Digital education is on hold. We gave E. a little free time. There was only little homework she would be able to do at the weekend at some point.
Again we played 80 Days Around the world until E’s classmate called her on Teams.
I’ve started to worry that we’re spending very little time in English. I hope the Angels will bring us some English speaking games.
5 December
Little L. looked out of the window in the morning and said: Can we go to the river bank? The weather is so sunny and nice. So after lunch we went to the river bank as she’d wished. We took beautiful pictures, the girls were throwing sticks and stones into the river. Even a dog joined them to play sticks.
There was an English speaking Grandpa with two of his grandkids and I encouraged the kids to go and play with them but they are not famous for their social courage.

Much to my surprise we also met some of E.’s schoolmates. We agreed to meet them again.
And the Advent Calender brought us some mini Santa puzzles that the girls had to colour. One is more beautiful than the other.

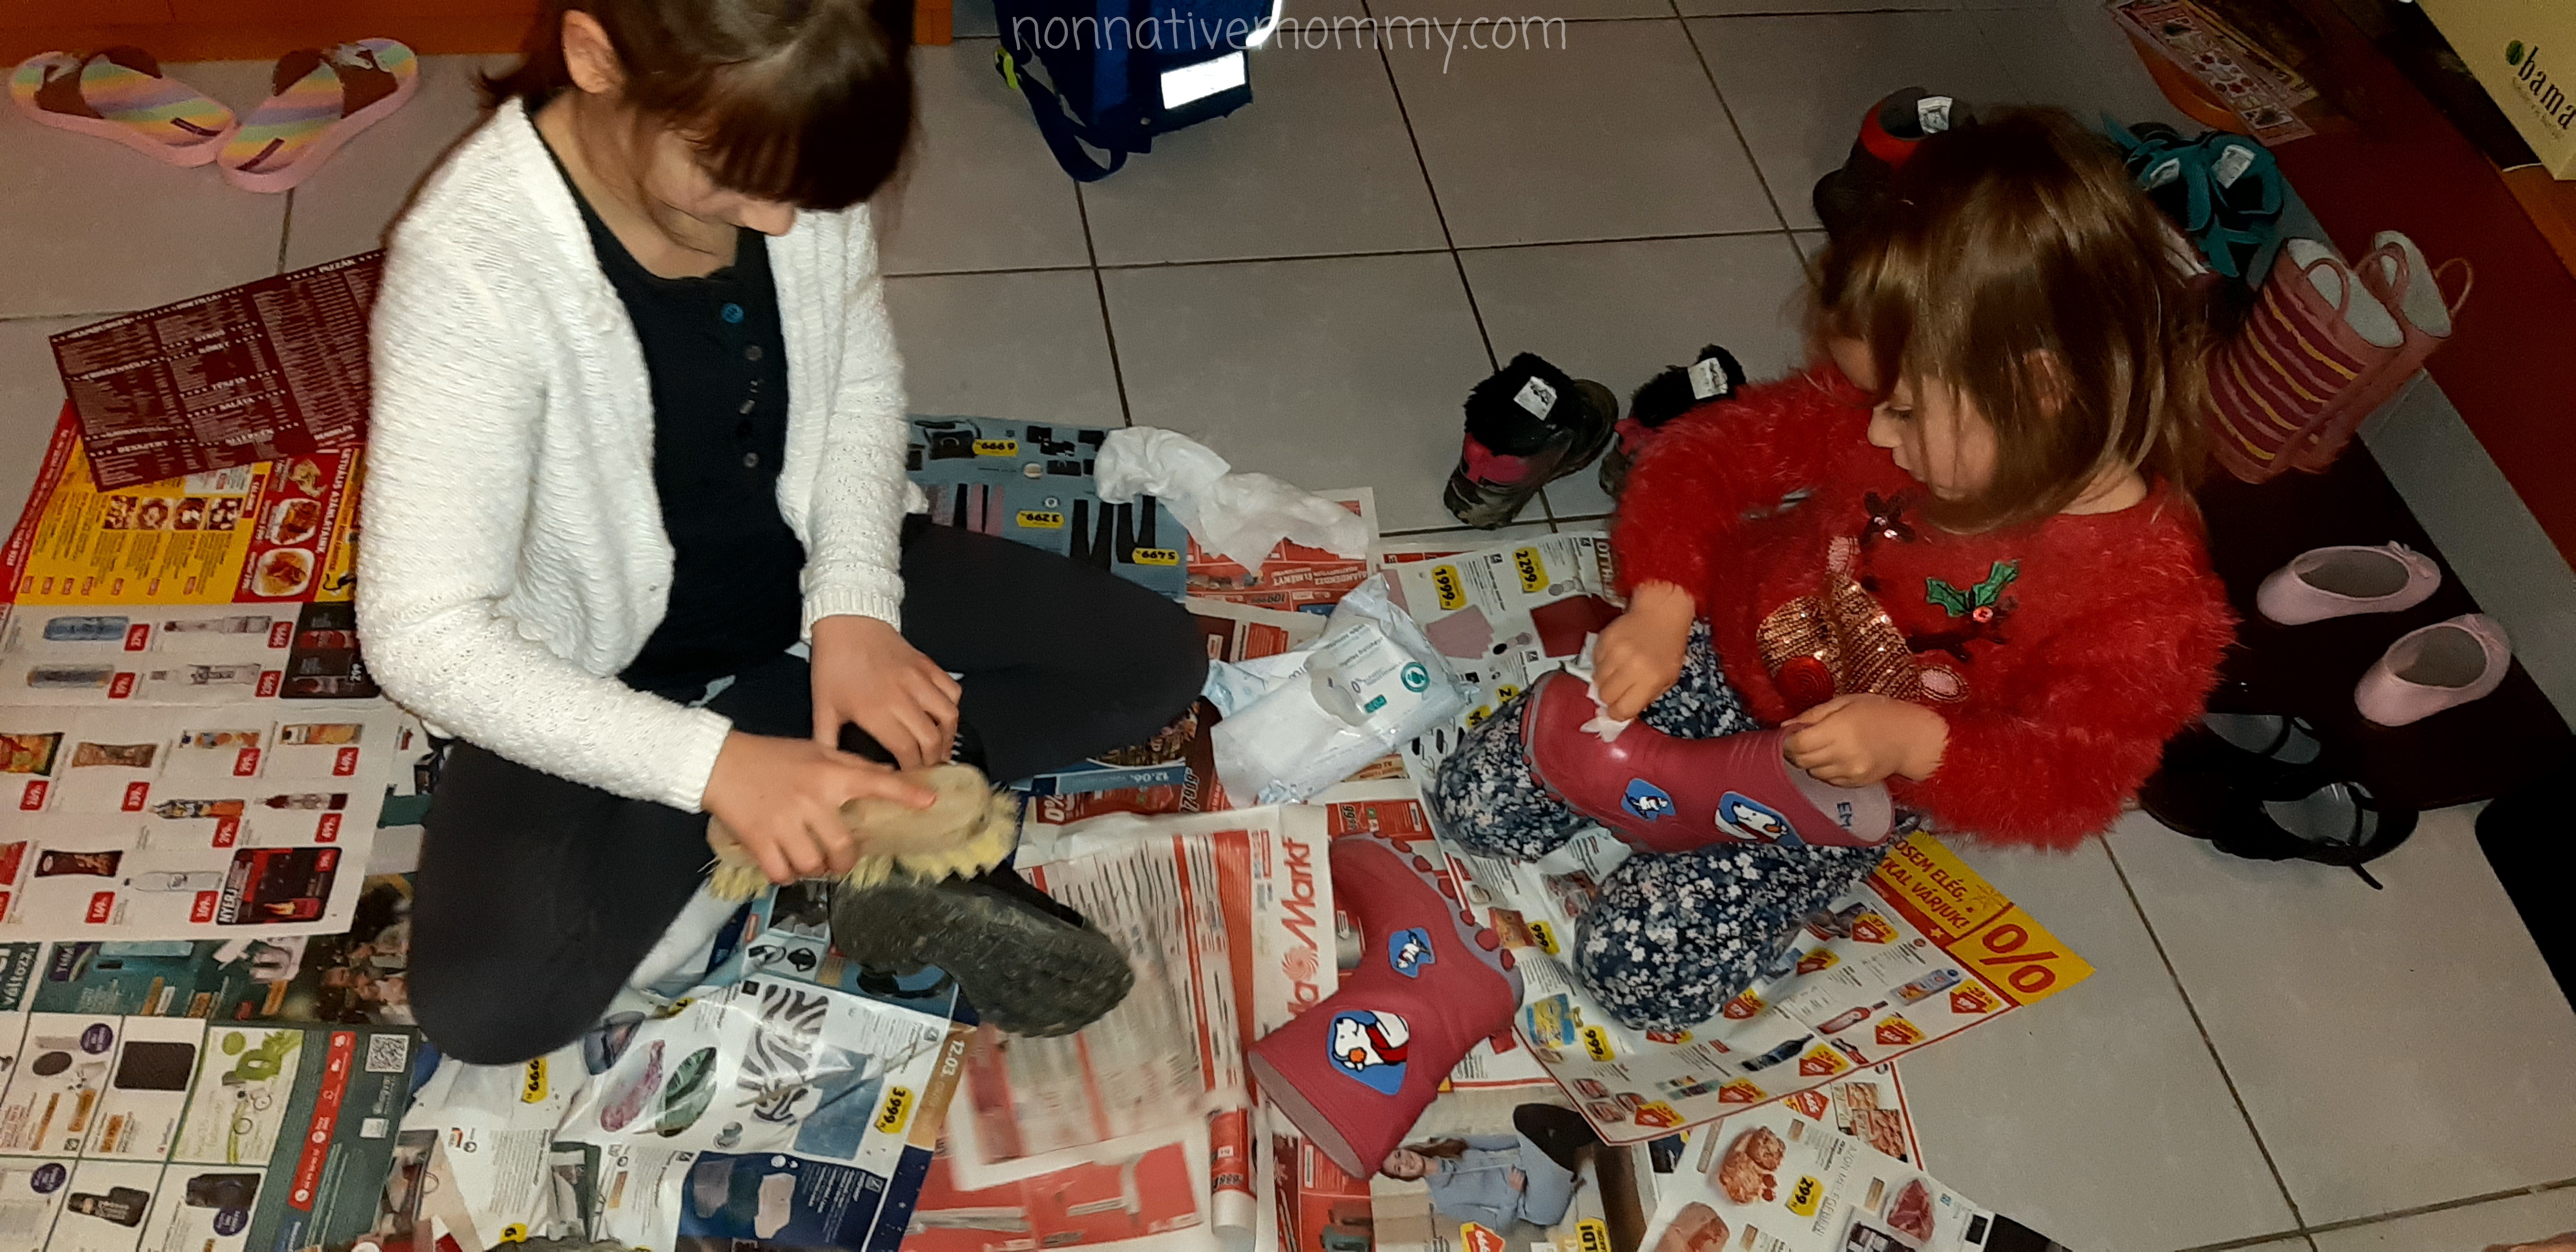
In the evening we cleaned our boots so Santa could put his presents in them by the following morning. It’s lucky that Santa was coming this weekend as the boots were so muddy due to the river bank adventure that I don’t really know how else I could have motivated the girls to clean them.
They also prepared carrots for the reindeer, biscuits and milk for Santa on the windowsill together with some drawings.

They were extra excited at bedtime. Little L put out her excited photo on the weather/date and emotion board. The magic of believing and hoping filled their hearts and our whole evening.

6 December
The morning started early so we could check Santa’s presents in the boots before going to the stables. The girls were over the moon to see the nice treats and little presents. There were no golden birch (a bunch of golden twigs, which is given to naughty children), thank Goodness.
After breakfast we were off to the stables to ride a horse. There was a little disagreement who could ride Sári, the brown pony, both girls’ favourite. To ease the tension, we promised E. she could ride the pony the next week at an extra session we would include in our weekly schedule.

After lunch we headed to the river bank to meet E.’s classmates again. We had a lovely time, the kids had lots of fun searching for sticks, rolling logs and building forts out of drifwood and sticks.
In the afternoon we played a board game that the Angels hid in the Advent Calendar. It’s called DON’T EAT SANTA!. On the link you can read about it.
We finished the day with another board game we’d already played earlier this week: 80 days around the world. E. managed to see through the main idea of the game and developed her own strategy and finally won. I am not really motivated to play board games any more. I’m always losing whatever we play with.
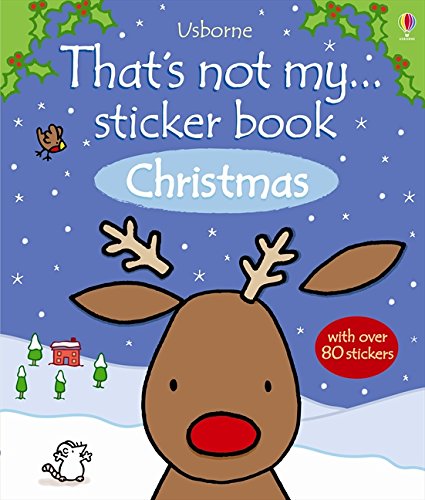
With Little L. and I played with her new sticker book That’s not my… She really enjoyed the time spent together. She was kissing and hugging me. We finished the whole book.
7 December
Online education was on hold today as both the class teacher and the German teacher were on holiday.
The Advent Calender surprised the girls with 2 candy canes. I made them pumpkin biscuits for breakfast that they could decorate as snowmen.

We were supposed to go horsriding but due to the rain we postponed it to Wednesday. The girls were a little disappointed so they spent the whole afternoon drawing ponies and magic unicorns.
We gave another try to play 80 days around the world, although I was rather unwilling. I had all the reasons … E. won AGAIN.
8 December
The girls got some hair bands, but they complained about that they were too tight so they transformed them into hairbobbles. The rest of the day somehow disappeared without knowing what we did. Probably nothing special. It was a school day so E. had to study and hand in some Maths and German tasks.


9 December
As we couldn’t go to the stables to ride the horses on Monday due to bad weather we had this extra session today in the late afternoon. E. could ride her favourite horse, the brown pony, Little L. was riding on a big grey Arab horse. L. was a little scared on the big horse but E. was delighted on Sári.
10 December
E had an online German lesson in Teams, while I was having a lesson in Zoom with one of my students. The girls got pink and purple hair bobbles from the Angels but they couldn’t agree who had which colour combination so I put them away. At bed time we read When Santa came to stay, which is a hit with the kids. We could talk about a lot of funny happenings on the basis of the illustrations. Great book, I highly recommend it.

11 December
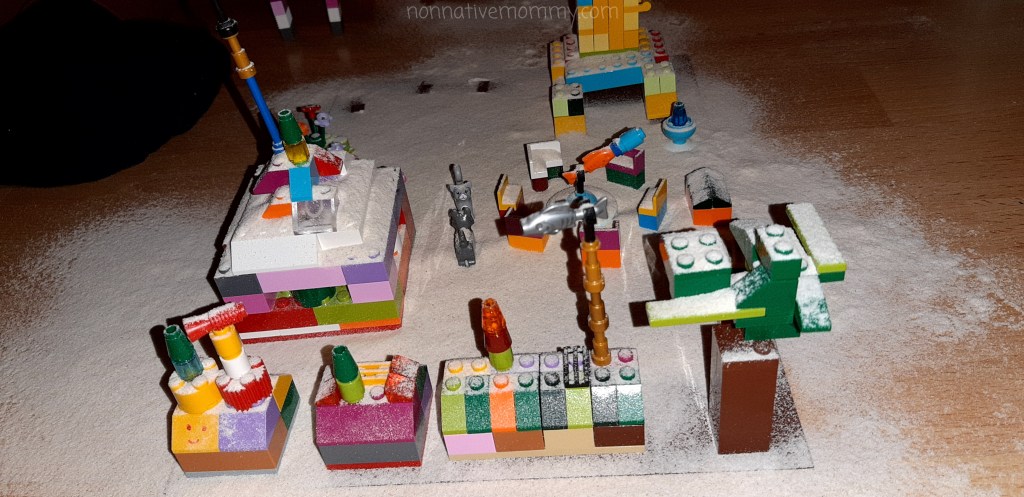
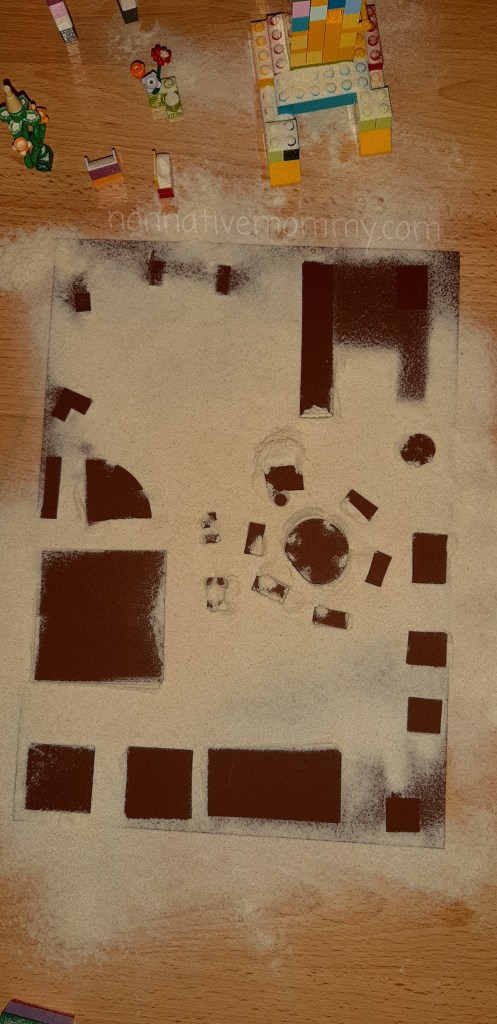
E. got homework from school that made both girls really excited. They had to build a minuscule city out of lego or other building blocks. They had to arrange the builings on a dark surface then snowed it over with flour. After removing the buildings, they could discover the plan of the town from birdsview. Although we were in Hungarian it was great fun.

In the evening the Advent Calendar surprised the girls with glow sticks so we arranged a light bath in the dark. I lit some tea lights and added some thyme oil in the ceramic aroma burner. The kids put the glow sticks in the bath and had lots of fun…. until they started to quarrel about who had which colour of glowstick. Aaaargh…


12 December
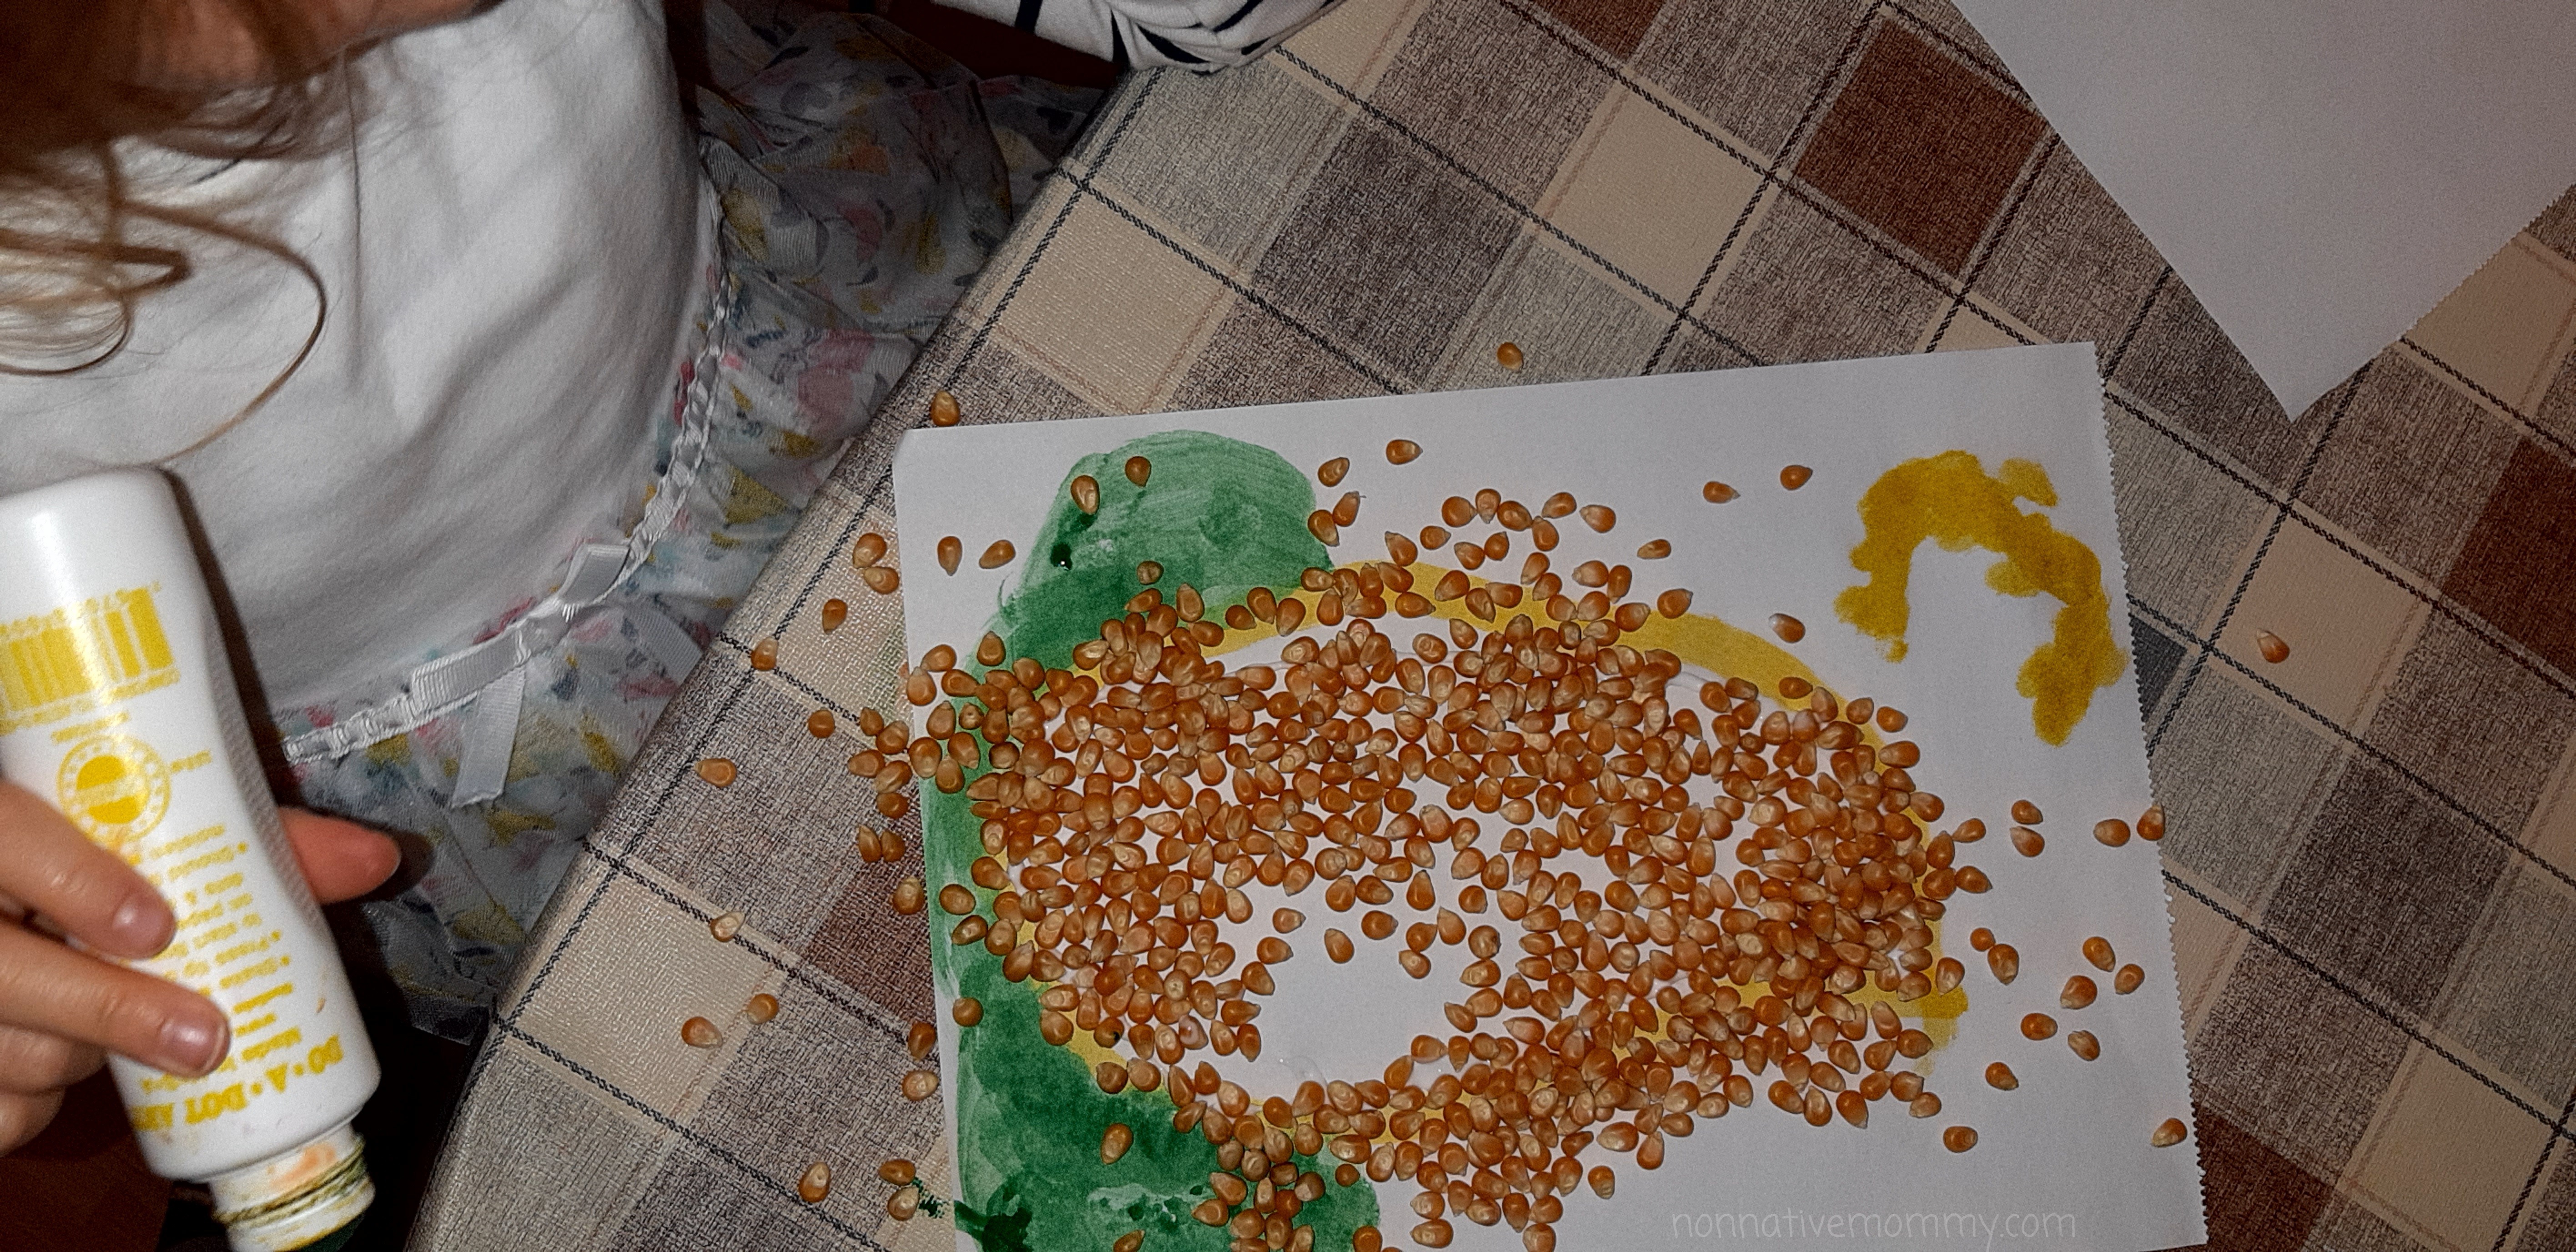
Bird feeder – we gave a present to the birds of our garden. I wished the girls to feel how nice it is to GIVE a present to someone else instead of RECEIVING one, and the Angels somehow listened to me and brought a lot of of tools and ingredients to make the birds happy.

Earlier we had prepared bird feeders so it wasn’t unfamiliar for the girls.
Apart from the seeds we added nuts and figs to the mixture this year. Also the kids prepared apple slices as some birds really like fruits. Check out the details on the link. (added later on)
13-14 December
Somehow we lost track of time. On these 2 days I forgot to take notes of what we were doing. On one of these two days the girls painted some candles that they will give as presents to loved ones and friends. (The wax paints and white candles were hidden in our advent calendar.) We also visited our town’s live advent calendar location. We started it in the middle of the month not on the 1st of December but better late than never.
15 December
The advent calendar hid a little poem (in Hungarian) directing the girls upstairs. A surprise tealight was waiting for them on their pillows.
Most of the afternoon was spent with playing horsey. Little L built a stable for her bouncy horse, fed her, gave her drink, took her out to the pen and for a forest run. E. was building horses out of Lego and did the same. Sometimes they joined each other sometimes they played on their own.
In the evening we went to hunt down number 15 in the live advent calendar at houses in our city. Much to my surprise and the girls’ excitement dairy free sweets were found at this house.
16 December
The Angels brought the girls activity packs. Little L. got more excited about it. While E. was doing her schoolwork, she did all the activities: cutting and pasting, mazes, matching, tracing and so on.
E was having a look at her bundle but hasn’t started yet.
The girls asked me to let them have a look at some Christmas tree ornaments. They were playing a lot with tinsels and baubles, stars and other decorations. Little L decorated the wardrobe with the tinsels and made Santa’s sleigh.
In the evening we had great difficulty in finding the next house in the live advent calendar. We were lost, the poem was not clear, but with a bit of help from the residents we found number 16.
17 December
We decorated the windows with stencils and silver spray. We were presented with the necessary tools by the Angels. It wasn’t an easy process, but the result was quite satisfactory.
As an advent present, we got some handmade ornaments at the 17th station of the live advent calendar we visited. Little L immediately sat down to paint and decorate her heart with great enthusiasm. E. hid in her room drawing and writing the user manual of their favourite game Horse Paradise.
18 December
The Angels asked the girls to make Christmas baubles for their Grandmas as a present. In the afternoon they did make it. It was a pity we were not in English.
E. had a look at her bundle of activities which she’d got 2 days ago. Mostly Harry Potter puzzles, quizzes and drawing activities. (We’re reading together the 3rd book of the series – The Prisoner of Azkaban.)
A few weeks ago, E. learnt to play Offenbach’s Can-can on the piano. I told her if she learnt to play the whole piece, I’d make her a “I’m proud of you” cake. So today I made and apple-cinnamon Bundt cake (out of rice flour and without eggs). It turned out pretty well, E and the whole family liked it.
Today we found house number 18, where the girls could choose little toy figurines as presents. They went for tiny cats. On the way home we bumped into house number 3, as well. We were lucky today. (We started this game only at house 12 – our neighbours)
19 December
It was a really active day and we spent quite a lot of time in English.
In the morning the girls decorated their own Christmas tree with bits and bobs around the house. Little L was singing the 12 Days of Christmas in the meantime. She knows the lyrics up the number 8 by heart.
We made some snowflake paper cut-outs and decorated some of our windows with them. (The idea was taken from the Rhyme Time free online advent ideas. It’s available every year.)
In the evening we prepared our yearly gingerbread. It was unfortunately very late when we finished baking them, but we have tomorrow to decorate them.
And let’s not forget that we found today’s advent number in our city.
20 December
The girls decorated the gingerbread. We took some with us when searching for the next advent window in our city. (Usually, sweets are offered at the houses but they are not dairy-free so the girls cannot have them, that’s why we take our own treat to enjoy as a reward for finding the house)
21 December
We are preparing for Christmas in every way possible. We were tidying everywhere in the house with the help of the kids. I put some Christmas lights on the kitchen window.
22 December
The girls got silver and gold glitter glue from the Angels (hidden in the Advent Calendar.) They didn’t get excited about them. I should find something out for them.
Today the whole family cleaned the house. Even the girls helped to pack away toys, fold clothes and do the laundry. I even cleaned some windows and put on some more window decorations: huge Christmas baubles. I prepared everything for the girls and while I was having a lesson in the morning, they were making the enormous baubles.
E. taught L. how to draw a horse with step-by-step instruction on the whiteboard. Both teacher and student did a great job.
We played 80 Days Around the world and Daddy won. E and L watched another episode of the cartoon.
23 December
We made bauble greeting cards for the grandparents with yesterday’s glitter glue sticks. They turned out great. We also put together little packages to 4 of our neighbours and tried to give them (two of them were successful the other 2 we’ll try tomorrow). The presents included our home-made fig liqueur, dried tomatoes in olive oil, chocolates and angel greeting cards made by the girls. (You can find the paper angel greeting card craft on the link). E and L prepared with a short song that they sang to our neighbours.
Our Advent Calendar hid two bird-shaped, ceramic, Christmas ornaments that girls should paint and give it to someone special to them.
24 December
The Angels brought the decorated tree in the morning (first time ever). What is more, Baby Jesus also placed his presents under the Christmas tree. The girls had their quick breakfast (oatmeal and gingerbread), got dressed and we entered the living-room where we found the beautiful tree and lots of presents. We had all the morning to open and enjoy the toys, games and other fun gifts.
In the afternoon we talked to the grandparents and visited the last house of the live advent calendar, number 24, which was actually in our street in walking distance. On the way home we met one of our neighbours and could give them the presents.
We also watched the Nutcracker ballet online on the facebook page of our Opera House. Before dinner E. put together her mini-Rubik cube,
25 December
In the morning there were a lot of playing with the new toys. I can say that Little L’s favourite is Hafici the husky that can dance, sit, give her paw, and do tricks. E’s favourite toy was 8 knitted mushrooms in a basket.
We visited my mother-in-law in the afternoon. It was a unusual family celebration as we didn’t eat together and we all wore masks (no kisses). We video-phoned some relative who we couldn’t meet this year due to the coronavirus.
26 December
We visited my mother in the afternoon. The Christmas celebration was similar to the previous day (no food, no kisses, masks on). Still, it was good to meet after a long while.
27 December
E. prepared a colouring book for little L’s 5th birthday. She made it herself on the PC, printed and wrapped it. She is getting the vibe for giving rather that getting presents. She wrapped some more presents in different earlier saved wrapping paper (Reduce, reuse and recycle!)
Although it was 0 degrees Celsius in the morning, we went horse-riding. We took some Christmas presents for the horses: a big crate of apples, carrots and beetroot. The trainer fed them with the treats after the training.
The highlight of the day was the Netflix film Christmas Chronicles that we watched in English of course. Both girls enjoyed it to a great extent. A bit sentimental, but a real Christmas movie.
28 December
E helped me wrap Little L.’s birthday presents. She is very excited about the coming birthday. After wrapping we read quite a lot from her Harry Potter book (The Prisoner of Azkaban) before lunch.
The girls were playing nicely together in the afternoon. So I could read the book I got for Christmas (Olga Tokarczuk: Drive your plow over the bones of the dead) and also watched another episode of The Queen’s Gambit on Netflix. What a treat!
29 December
We celebrated Little L.’s 5th birthday in the morning. She had a peach cake for breakfast (I’d made it the night before) and got lots of presents. Her favourite is, I guess, Pop the pig game.
After lunch we went to the grandparents to celebrate her birthday. She got some more present (her first ever Barbie, with dogs, Barbie clothes, a remote control monster truck) but we did not eat or drink and wore our masks.
The highlight of the day was the Netflix film Christmas Chronicles that we watched in English of course. Both girls enjoyed it to a great extent. A bit sentimental, but a real Christmas movie.
30 December
We finished the 1000-piece puzzle that Daddy got for Christmas. He put it together mostly by himself, we, the girls, only helped a little, mainly towards the end.
31 December
We didn’t do anything special apart from the pizza we ate for lunch and dinner too. E. and L helped put the toppings on. According to Daddy it was better than the pizza we had ordered a few weeks before.
The girls wanted to watch the 2nd part of the Christmas Chronicles, so we did. They liked this one too. Little L.’s favourite part in both movies is when Santa sings and dances. E. found it funny that the elves spoke another language (Elvish), she also found the little elves cute.
There were no party games and party foods, we didn’t go anywhere. The only thing that reminded us of New Year’s Eve was the fireworks that started around 9 o’clock. The girls fell asleep around 11, couldn’t and didn’t really want to wait for midnight. It was a calm and peaceful, ordinary day of the year. We planned to open the Memory Jar, but we were all very tired, so we left this fun activity for the first day of 2021. Happy New Year!