Roll painting

L. got ill after the first week in kimdregarten. Nothing special, she’s well enough to play around at home so I needed to come up with something I could keep her busy with.

She’d been bringing in a lot of cones, walnuts and other seeds from the garden and I wanted to put them in good use.DSC05238

After our moving I’ve still got a lot of boxes so I took one’s lid and cut some paper sheets into it. I also provided her with some paint and the fun could begin.

She squirted paint on the sheet with great concentration and dropped in some her findings.

DSC05245

Then she picked up the lid and moved it about and spread the paint on the sheet.

DSC05249

We used different colour combinations.

DSC05271

Then she stamped with them to make different prints.

DSC05273

Finally Little L went for some sensory fun with her fingers and hands.

She was happy to notice that all the colours ended up making a brownish shade.

DSC05293

Her painting took a while to dry but after drying we dispayed them in our living-room.

A little artist was born 🙂

20190205_164213


Mix it up!

New York is book lovers’ heaven. After our NYC trip, we returned with tons of children books we bough at a really low price. One of them was Mix it up! by Hervé Tullet. It’s an interactive book about colours and colour mixing.

CHR190__58228.1415825049.450.800.jpg

There are several activities online based on the book. You can check them out on pinterest, but I decided to make our own. A simple but fun activity that my 2 and a half year old could do easily and with joy. (You can download your free copy at the end of this blog post.)

Before starting the worksheet, they were just painting for fun in their journals. (We put a piece of cardboard under the page so the paint doesn’t bleed through.)

DSC03730

Next, I gave them the Mix it up! copy for each of them. First, they painted the primary colours, blue, red and yellow.

DSC03733

Then came the mixing. Little L. needed help with washing the colours out of her paint brush, but she wanted to do it all by herself.

DSC03736

E. painted and mixed the colour like  a pro.

In the meantime our native nanny, N. arrived and joined in. They wanted to paint some more so everyone got a sheet of paper and free painting continued.

DSC03743

Little L. got tired of the limitation of paint brushes and she started to use her fingers. She used more water than paint. In the end she decided to throw her last work of art into the bin. (lucky I could save the others.)

The difficult part came: cleaning up. The girls could choose what to clean up at the end. E. chose to wash the paintbrushes out, L. helped me put away the paint and clean the table.

Now here you can download your free copy of our mixing activity.

I can highly recommend both the book and the painting activity. Have fun!


Autumn tree with a dropper

Thanks to our Helen Doron teacher we have 2 really easy-to-use droppers we put in use as soon as we got them.

I took out some cotton pads, coloured some water with food colouring in little cups and the dropping could start.

To be honest, I tried the droppers with Little L. while E. was in kindergarten so the initial excitement fades a little away when E. starts working on the colouring project.

On a tray I put 2 pieces of kitchen roll in front of her, plus the autumn colours: brown, orange, yellow, red and green. (Mind you, not at once. She got 3 colours at a time and I changed one colour from time to time)

And she was mesmerised:

20171002_15520620171002_155253

20171002_155536

20171002_155758 (1)

We went to pick E. up from the kindergarten and when we arrived home this had been waiting for them:

20171002_161322.jpg

E. got really excited and L. was also happy to see the droppers again.

20171002_175303.jpg

E. noticed that all the colours are connected to autumn. She chose the colour combinations very accurately and used the dropper very gently.

20171002_17482720171002_174920

Not like Little L.

She was pushing, stirring, squeezing the dropper. She had lots of fun too.

20171002_175941.jpg

After having finished with 2 sets of cotton pads, we let them dry. Then on another day we took them out and painted a tree for them. E. stuck up all the “leaves”.

20171018_101905
20171018_102353

20171018_102430

We still had some more painted cotton pads.

– But Mommy I don’t want to make another tree.

– Make a bush, then.

Her eyes started to glow with excitement. I got her a new sheet and she did make a bush.

During the making of the autumn tree and bush Little L. were playing with our new nanny. Yes, yes, we’ve got a new native nanny. But I’ll write about her in another post.

Jellyfish

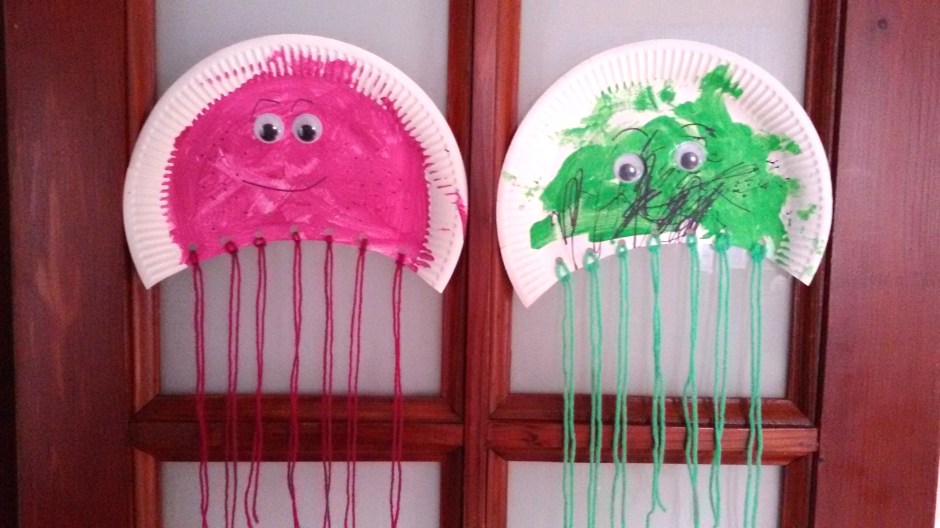
As E. is into sea animals and we haven’t had a craft project in ages, I though I would put together this easy jellyfish craft for the girls. I was keeping my fingers crossed throughout the preparation so they would both enjoy it.

What I prepared:

  • 2 paper plates (the bottom was cut off in a semi-circle line)
  • two colours of paint (pink and green; baby paint for Baby L. would have been better)
  • 2 paintbrushes
  • 2 pairs of googly eyes
  • 2 colours of yarn (pink and green)
  • glue
  • scissors (2 pairs)
  • marker (black)
  • hole puncher (I punched the paper plates before we started the activity, so it wasn’t around)

After nap time I put everything on the dining table and placed Baby Sis in her high chair. She was quite excited. E, with a curious smile on her face, settled down next to us. I told them easy instruction as we went along because of Baby Sis.

Like: Here is your paintbrush. Put it in the paint. It’s green. E. has pink. Touch the yarn. This is glue. I’ll put a dab of glue on the paper. etc.

First, we painted the paper plates. ( I used a hairdryer to speed the drying process up)

PICT0058

Baby Sis tasted it a bit and wiped it in her hair.

Then I told them we needed to cut pieces of the yarn.

PICT0061

Baby Sis enjoyed touching and pulling the yarn apart.

PICT0063

E. was great with the scissors and cut quite many stings which were more than less the same length.

On behalf of Baby L. I was cutting the yarn. She took great interest in the scissors.

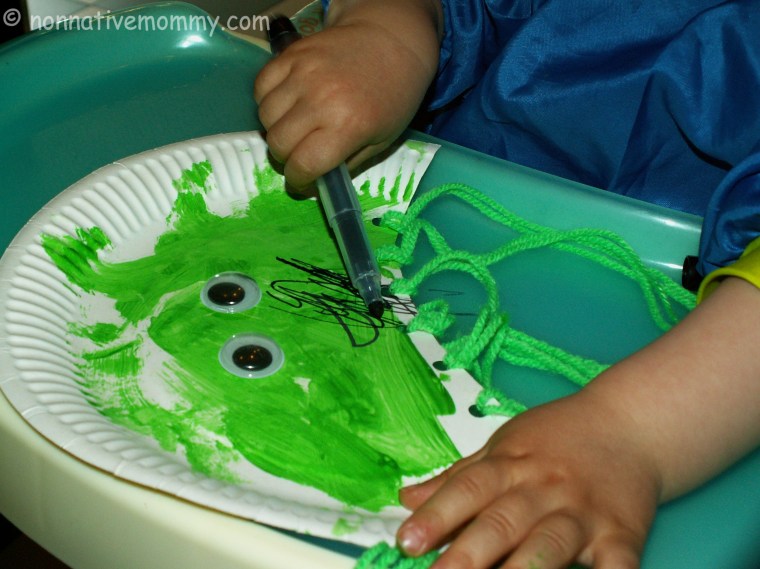
We halved the yarn pieces, the part which formed a loop went through the punched hole on the paper plate. Then the other end of the string was pulled through the loop. These stings made up the jellyfish’s tentacles.

Finally, we glued on the eyes and drew a mouth. E. did it all by herself I worked for L. while she was busy with something (fingering the yard, trying to open the scissors, putting the googly eyes in her mouth so I needed to be really watchful)

Baby Sis decided to decorate her jellyfish with the marker a little more so E. added some spots and eyebrows to hers.

PICT0080

We displayed the happy jellyfish on our living-room door. When Daddy came home he immediately noticed the lovely creations.
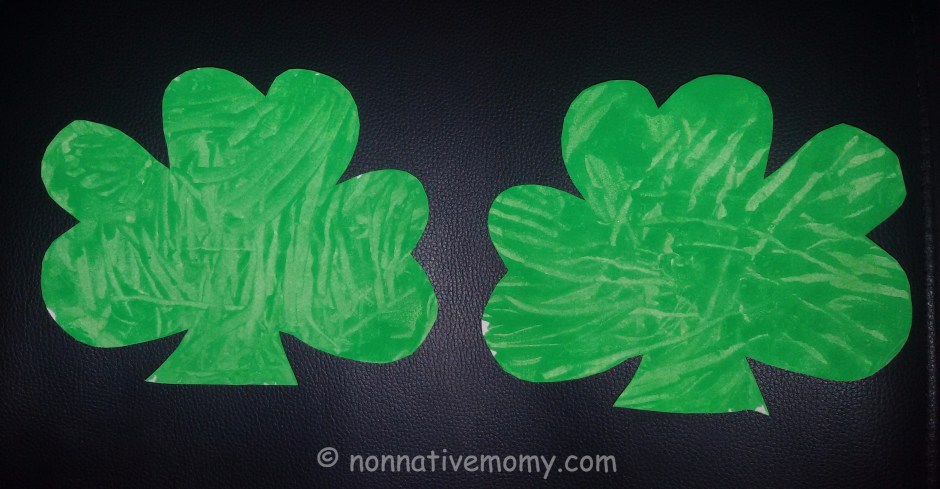
20170529_182204[1]

This activity was absolutely great for both girls:

  1. At long last we had a CRAFTY afternoon.
  2. L. had great SENSORY experience.
  3. E. practised fine moter skills like CUTTING with scissors and threading.
  4. L. learnt the word jellyfish and listened to new INSTRUCTIONS.
  5. The girls had fun TOGETHER.

No St. Patrick’s Day in 2017

St. Patrick’s Day was cancelled in our home this year although this is one of MY favourite holidays. Baby L. is too small to understand any of it, and E. was totally uninterested. She didn’t even want to read a book about it.

E. has been into painting recently so I came up with a very easy no-mess painting idea that both of the girls could do. (Like this baby painting)

What you need:

  • green paint
  • construction paper or cardboard
  • scissors
  • zip-lock back

What we did:

I cut 2 shamrocks out of construction paper, put blobs of green paint on them and slipped them in the zip-lock bags.PICT0054_JPG

I cello-taped L.’s on her highchair but after few poking movements she grabbed the whole thing and pull it off of the tray then threw it away.
PICT0059_JPG

When we gave it back to her (after having shown how to spread the paint on her shamrock) she wanted to open the bag.

PICT0073_JPG

E. was working on it a little while, pushing the paint into all directions, but I didn’t add enough so she had hard time to spread it everywhere. She needed my help.

PICT0069_JPGPICT0076_JPG

At least we finished it but the interest fell from 0 to -5…

Well, I’ve learnt something today… If they’re not interested, don’t push it. Lucky I didn’t spend more than 5 minutes to prepare the activity.