Peony petals suncatcher

I’ve seen tons of suncatcher ideas on pinterest and I’ve always wanted to try it with E. As the bunch of peonies I’d got from my mum for Mother’s Day started to lose their petals, the right time came to make our first sun catcher.

As it was a sudden idea when E. started to play (collect and cut) the fallen petals I didn’t have time for too much preparation.

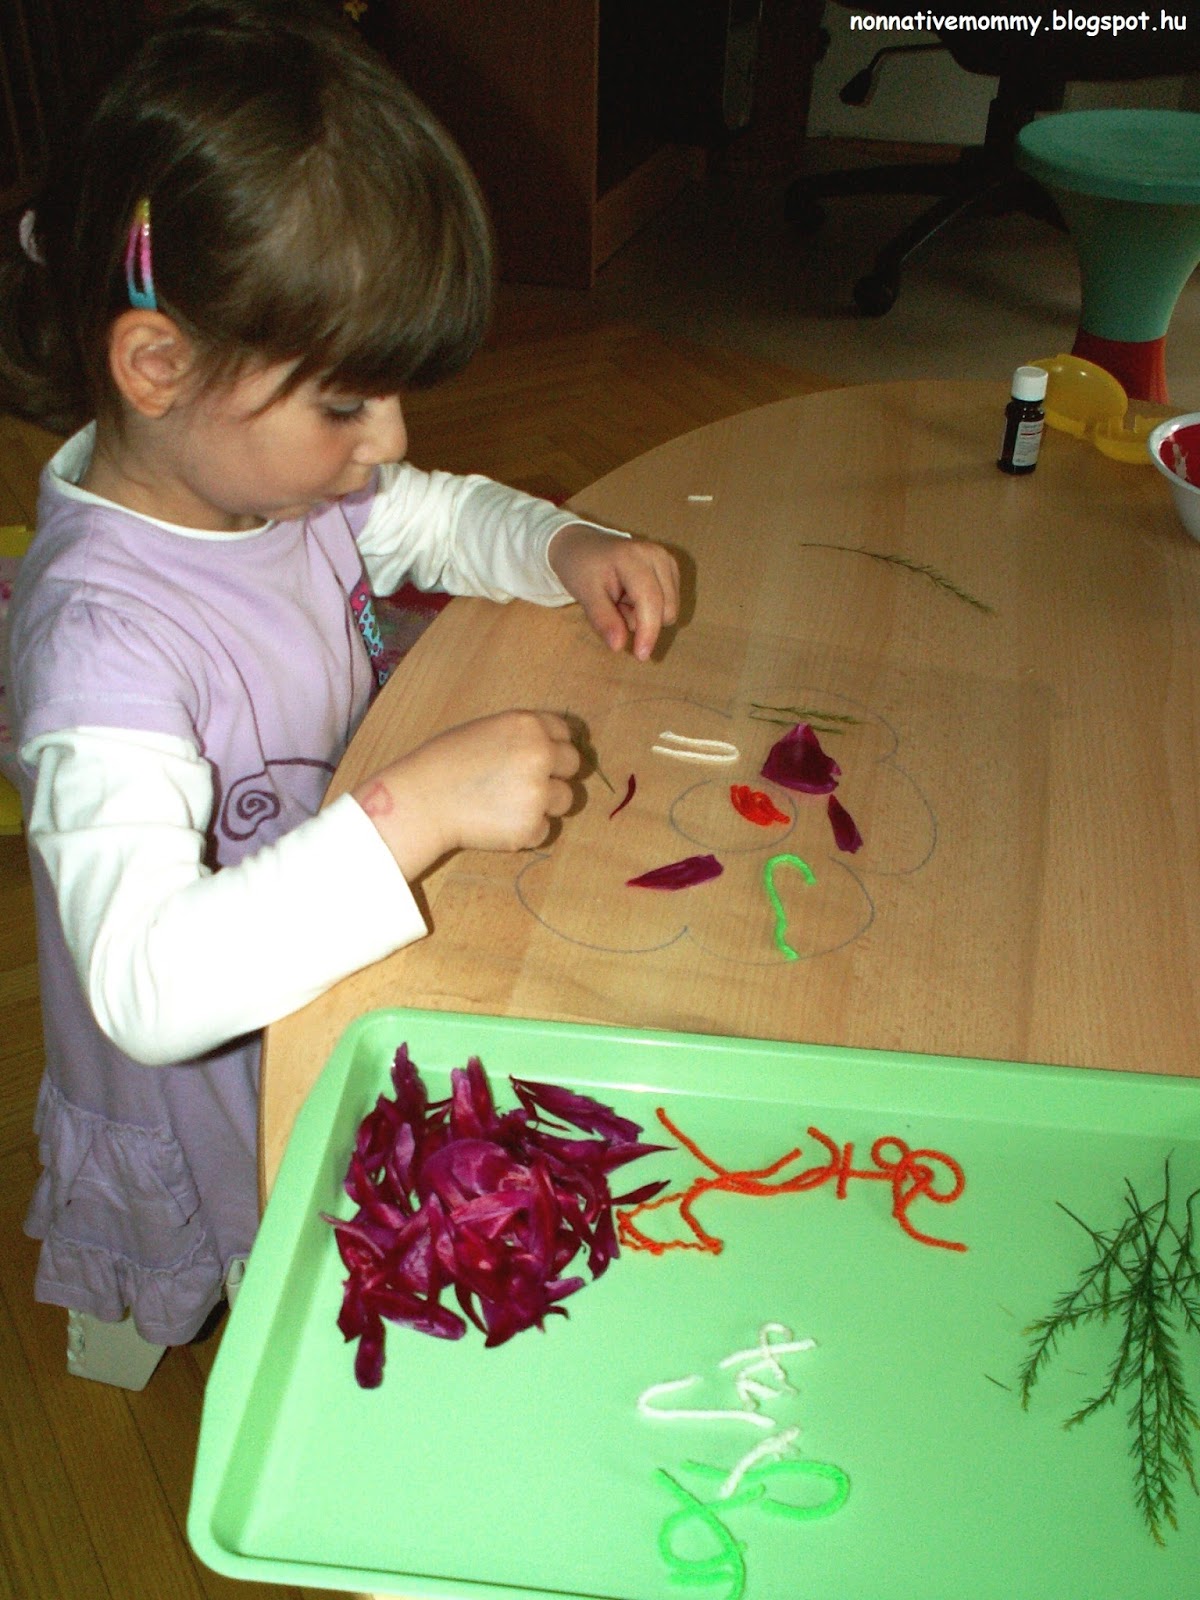
I took out our sticky paper (originally it’s self-adhesive school book cover) and drew a flower on it (the transparent backside) with a permanent marker. (You can cut a flower shape outline out of paper and stick on the sticky side but I needed to be on the double). I pulled off the white part and fixed it on the table (with cello tape). I also presented some leftover yarn and green leaves on a tray apart from the petals.

E. did the sticking.


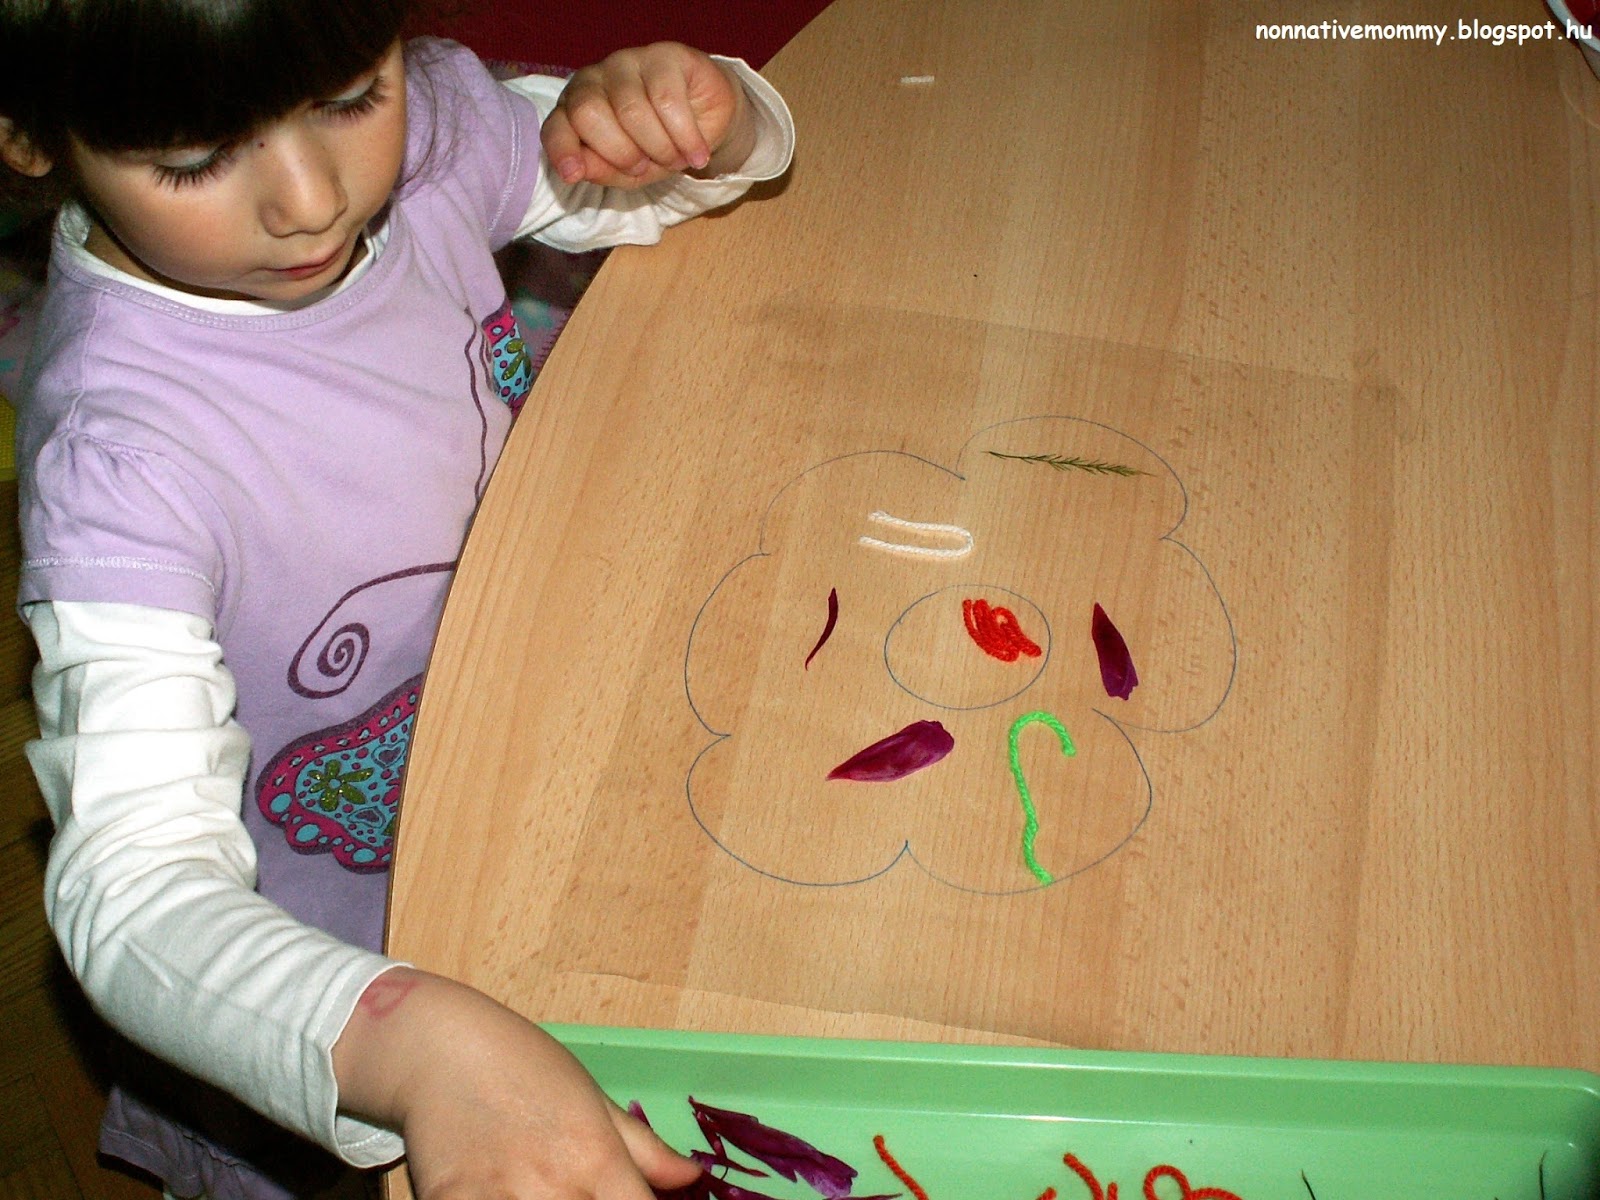
I wanted to talk about the different parts of the flowers but she wasn’t interested. Maybe at another time. She was too busy with the sticking.

Then when she told me she’d finished I put another sticky sheet over it (sticky side facing down) and cut along the flower outline.

The last thing E. needed to do was to stick the suncatcher on the window (with some Cello-tape, but you can also hang it)

I’m sure we’ll do some more suncatcher crafts.

Sorting rubbish – free printable

Much to my surprise E. remembered last year’s home-made selective rubbish collection activity and asked for it again. I didn’t plan to do this sort of activity this year, but I was kinda gently forced. However, I prepared a follow up activity for her. (You can find the free printable at the end of the post)

So just like last year I collected some recyclable rubbish like plastic bottles, old newspapers and leaflets, egg carton, dog food cans and beer cans, bottles and containers made of glass etc. It wasn’t too difficult as we hadn’t emptied our own selective bins. I printed selective bin signs (plastic, paper, glass, metal) and stuck them on 4 shoe boxes. I prepared the recyclable rubbish in a plastic container (originally used for storing toys in it)


E. wasn’t as fascinated about it as last year but she did the selection (I might have given her too many items to sort.) This year we added a little twist.

I asked her how she can decide what is made of which material. She didn’t know.
I asked her while she was checking the objects:

– Can you rip it?
– Can you crumple it?
– Is it hard or can you squash it?

The bold words were new to her so when I asked these questions I showed her the actions.

So she tested every piece and then threw them in the right box. (Cartons were hard to rip but she tried anyway 🙂  )

While she was doing the sorting I told her how we use these materials to make other things, like new paper out of old cardboard and newspapers or shoes and backpacks out of plastic. She wasn’t talking much but I hope she listened.


To reinforce selective rubbish collection with another activity that is different from the one last year I made a worksheet for her.

She needed to place recyclable rubbish in one group and non-recyclable in the other one.

We needed to discuss that dirty napkins cannot go to the recycle bin but should be thrown into the households rubbish bin.


Done!

Download free printable for the sorting rubbish task. Just click on the link.

Water pollution – the experiment

I wanted to create a sensory bin for E. connected to Earth Day. What makes this difficult is she doesn’t like to dirty her hands, so we tried the water pollution idea I saw at Every Star Is Different, as she could use some tools to work with rubbish.

What you need:
– clean water in a tub of any kind
– rubbish (banana peel, orange rind, crust of bread, tea bag, plastic packaging of any kind etc.)
– oil (optional – it makes cleaning up difficult)
– tongs
– strainer
– a bowl to put the rubbish in


What to do:

We talked about the clean water and name every piece of rubbish. We also mentioned natural waters (seas, oceans, rivers and lakes) and that animals live in there.

Then I asked E. to throw all the rubbish in the water. She was quite reluctant at first.

– Why Mommy? It will be dirty.

That was the point. I told her about the scarce drinking water on Earth and also about poor animals which try to survive in the dirty waters.

She also poured the oil in, which was a brave move from my part as everything got oily. The cleaning up lasted forever.

Then she fished out the rubbish from the dirty water.

She tried to clean the oil and the small tea leaves too with a strainer but she didn’t manage, of course.

We drew the conclusion: We need to take care of water and keep it clean because we can’t drink it  or animals can’t live in it if it’s dirty. And water is essential for life.


Earth Day Patterning – free printable

Celebrating our Planet on Earth Day (22 April) is a good occasion to have another patterning activity with the well-known symbols like the recycling sign, bins, bottles, newspaper, plants and the globe itself. In the past we did quite a lot of patterning activities on Valentine’s Day or on St. Patrick’s Day and it has always been a hit with E.

(The link to download the free printable is at the end of this post)

As soon as she saw the prepared material she sat down to work on it. First, we named what she can see in the picture. She could name them all. She didn’t understand why there was a tree among the picture cards:

E.: – Why is the tree here?
M.: – Because they make the oxygen for us.
E.: – Yes, and we need air.

She didn’t ask about the flower, though.
When she found the water drop picture, she simply stated: – We need water too.

She moved from the easier ABAB pattern…


…to a little bit more difficult AABAAB and ABBABB patterns


We left the most difficult to the end: ABCABC But she enjoyed it very much, although it was hard for her to concentrate this long.

The four sheets were long enough for her. She didn’t want to make her own patterns on the empty grid. Maybe at another time. But you can do it 🙂

Download the Earth Day pattern activity for free on this link. And have fun!

Easter patterns

We’ve already covered the basic patterns when we were talking about clothes, but decorating Easter eggs has brought the topic up again.

Checked, flowery, stripy, plain, spotty were the words to revise. Much to my surprise E. remembered them.

We did a little painting but E. was not willing to paint patterns, so I followed her lead. It was a long time ago when I gave up sticking to a project.

At another occasion I drew Easter eggs on the whiteboard and also the name of their patterns mixed up. She enjoyed matching the words and the patterns. She also mentioned that we can call something spotty polka-dotted as well.

That’s all about patterns at Easter. I’ll come back with another post on our Easter this year.