Our first dental project I. – videos, books, apps

As we have visited the dentist with E. I looked up some videos, book and apps on dental health beforehand. This post is an appetiser before I share with you some real fun dental health activities.

English videos

Brush, brush, brush by KidsTV123

Brush your Teeth by Busy Beaver
The VERY favourite one!!!! Brush your teeth by Topsi Smile TV


Brush your teeth by StoryBots (we just couldn’t leave this out 🙂 )
A Peppa pig episode: Peppa and the Dentist
Two videos in Hungarian:
Fogmosó dal by Kerekmese
Bori a fogorvosnál (11 minute short story about what happens at the dentist’s)

Now the books we’ve been reading about teeth and going to the dentist:
Here is a video in which a lady reads out Show me your smile. The quality is not the best but it gives you an idea.
Another book we are looking at is Izgő-mozgó fogaim published by Manó könyvek.
It’s a great book with flaps to open, teeth to move and learn a lot about teeth, like parts of a tooth, baby teeth vs permanent teeth, how teeth grow, when and why they fall out, what happens at the dentist etc. It also has some interactive pages where you can pull a tooth out or glue a picture of yourself with no, one or 20 teeth. The book goes with a little tooth box for the first fallen-out teeth.

I read this book to E. both in English and Hungarian.

This is the book she took with her when we visited the dentist:

Apps for android

It’s not just about teeth but all kinds of health problems (broken bones, rash, fever, weak eyes etc). The player needs to heal the kids by taking them to the right department.

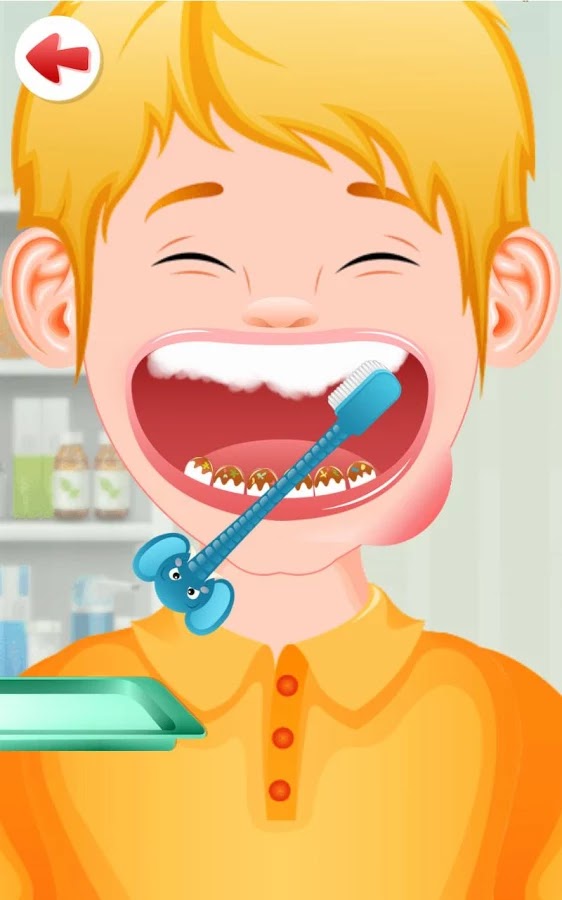
E.’s favourite is the dental department where one has to remove plaque, clean the teeth with a brush, drill them and kill germs, plus, at the end the player can choose coloured braces as well. E.’s favourite  part is killing the germs in the mouth. The other departments also means a lot a fun. You can take X-ray photos of broken bones, or you can injections or examine blood in a laboratory.

Just like the previous one you need to heal children with all kinds of health problems. Still, this also has a dental department. This game is a little bit more disgusting for me – not for E. (the germs has to be pulled out of the ear or off the teeth and they are not as funny looking as in the other game). What E. likes the most in this game is when you heal a child, funny animal balloons are floating down from the top that you can pop.
We’ve tried some other games too, but either E. didn’t like it or they were a little scary/disgusting for a 3-year-old.

I hope you could find some ideas to watch, read or play with your kid. Let me know if you could add any more to this list. Thanks for popping in.

Number games

I’d like to show you some (4) number games E. likes playing any time, any place. These activities cover number recognition, counting, colour matching and fine motor skills as well up to number 10. A little bit of skip counting is also involved.

1. Counting Caterpillar

As we are great fan of Eric Carle’s The Very Hungry Caterpillar, when I found this Counting Caterpillar Busy Bag I was more than delighted. The printable is free.

I’ve changed the pom-poms into small coloured stones. The reason for this change was I found the pom-poms too slippery on the laminated sheets.

So what I did:

  • I printed the caterpillars from the site above

First, she put the cards in order from 1 to 10

  • I laminated the cards
  • I prepared the colourful stones in a little bowl

Then she started to put the little stones on the body of the caterpillars. She paid close attention to the right colours. Pinching up the little stones really helps the hand muscles to strengthen.

She was saying the numbers out loud while placing the counters

Sometimes she asked me to do it in turns.

I’ll put on the last one.

2. Apple counting

This activity is a part of the fruit unit among the various great free printables from Welcome to Mommyhood. (You can find the printables at the bottom of the blog post and the apple tree activity is on page 12. This printable is also free of charge)

3. Ice-cream counting fun

With the summertime here we just couldn’t avoid some ice-cream activities this summer either.

The FREE printable of this Ice-cream counting activity can be found on one of my favourite educational resource pages: The Measured Mom.

Just go to the page above and print the ice-cream and number cards (laminate them for durability – optional) and the counting can begin.

Counting the candies on the ice-cream

placing the right number on the cone

You can finish this activity with licking some ice-cream.

4. Count the coloured sticks

Colours have always been E.’s favourite. So we started matching colours quite early, when she was 13-14 months old. This activity involves colour sorting and counting as well. A year ago I made these coloured paper rolls for sorting colourful objects.

First, I put number 1, 2, 3 and 4 in front of each paper rolls and E. needed to put the exact number of coloured sticks in the right place. Then came the idea of skip counting:

If you liked these games, check out my earlier posts about numbers:

If you still want some more, have a look at my 123-number games collection on pinterest.

August 20th – another Hungarian national holiday

As we have just returned from our holiday from the mountains, I haven’t had time to prepare something special for today. 20 August is the 2nd biggest national holiday in Hungary. (I’ve already collected some activities for the first most important one i.e. 15th March).

We also call 20 August Saint Stephen’s Day or the commemoration of the Foundation of Hungary as a state or “the day of the new bread”. If you’re interested in the background of this Hungarian holiday, please check the links.

So quickly I put together some fun crafts connected to our modest celebration after having unpacked our suitcases and started the washing machine.

On the way home sitting in the car, E. could see the Hungarian flag everywhere. She got quite excited  and pointed at all of them shouting: Hungary… so we made this flag out of crepe paper (red, white and green) and a piece of wooden skewer. You need some glue and that’s all.

What you need are in the pic:

  • crepe paper strips (red, white, green or the colours of your country’s flag)
  • skrewers
  • glue

Place one piece of crepe paper under the skewer and add some glue

Then roll the crepe paper on the skewer

Repeat it with the other colours one below the other. Let it dry for a few minutes

Éljen a magyar föld! – shouted E. swaying the flags

The easier the craft is the more fun you’ll have afterwards.

As we celebrate 20 August with massive fireworks over the River Danube at night, I thought we could create our own fireworks at home. We are not going to watch it in person as it is always extremely crowded and the weather has rather been capricious lately.

I’ve taken some ideas from 4th July celebrations. Check out the pinterest board on the topic.
This exact fireworks straw paint is more than fun to make.

On the link above you can find the detailed description, but here it is in short:

  • stretch and bend 7 straws and cello-tape them together (I made 2 sets)
  • prepare red and green paint in  two plates
  • provide a white sheet
The painting can start. Your child needs to dip the straws into the paint and make prints with both colours.
Even Daddy had fun 🙂

Our own fireworks at home
Did you celebrate 20 August somehow? Let me know what you did together with your little one in the comments.

Flower crafts

This post should have appeared in May the latest when we finished our flower projects. Well, there are tons of flowers around us during the summer time so it’s never too late to have a closer look at them.

Now I’d like to share  2 of our flower activities with you (later, in another post I’ll write about some science experiment involving flowers)

1. Bottle cap flowers 

I’ve been collecting bottle tops for a long time and I’ve only had one or two good ways to use them, like the bottle cap calculator or the colour matching and size sorting activities. (I know, I know there are a number of great ideas out there how to use bottle tops creatively)

What you need:

  • bottle caps of different colours
  • green straws
  • glue
  • cardboard
  • scissors (optional – not in the picture)

How to make it:

Show and explain your child the different (basic) parts of a flower. E. had already known these parts so she named them as I put together a flower.

we didn’t go under the ground so no roots

Then we both started to work on our flowers. We were talking about what colour petals we chose or if our stem was long or short, if the flower had leaves or not.

E. used the scissors herself to cut the stems.

E.’s pic

Although not in our pictures, we also mentioned that a seed (Can you see in E.’ picture the tiny seed on the ground on the left side? It was totally her idea) should go to the ground and with the help of water and sunshine it grows into a flower (hence the watering can on E.’s picture and the sun in mine)

Mommy’s pic

This is just the first step on parts of a flower. We’ll expand the topic later on. I’m planning to prepare some flashcards and worksheets on more detailed explanation on flower parts.

2. Paper plate flower – a goodbye present

E. has said goodbye to her crèche teachers and started kindergarten in July. We prepared these paper plate flowers as part of her goodbye presents. (You can find the original idea through the link)

What you need:

  • paper plates (we used 3 for 3 flowers)
  • crepe paper of different colours
  • Popsicle sticks
  • green paint
  • glue
  • cello-tape (optional)
  • markers
How to make it:
Cut out flower petal shapes of the plates. First, I drew the lines on the paper plate then I started cutting.
As I know E. has no patience to do long tasks I decided to direct her attention on coloured letters written on the paper plate. The letters showed her where to stick which colour. Her focus was much better in this way.
I also wrote Thank you! in the middle and letters of her name she could trace.
I cut up the colourful crepe paper into small pieces beforehand. We ran out of them on the way so she wanted to cut more crepe paper herself.
Cutting practice
This was a great way to relax a little bit as there’s lengthy gluing involved.
Pinching the crepe pieces
just a dab of glue
A goodbye flower for Ms B.

Finally, we painted the popsicle sticks and glued them on the back of the flowers. (I fixed them with cello-tape just to be on the safe side.)

We did this projects in two goes as it was tiring and long-winding.
E. was still enthusiastic, even at the second round.

Unfortunately, I forgot to take a photo of all the three flowers so here is what we made for Ms K.
Needless to say, they were all over the moon when they received their presents.
Have you done some flower crafts or projects lately? Do not hesitate to share it in the comments below.

To be continued…. with a flower science experiment. Stay tuned!

Journal for 3-year olds

E. got a journal for her name day in July. At first, she wasn’t very interested, but now she is getting the hang of it. I presented her with a journal because I want her to draw more, which she doesn’t like much. Secondly, we are a journal writing family, and I only hope she’ll join the club.

I got some journal ideas on pinterest, some of which I’ve collected in a new board.

So here it is what E.’s first journal look like:

the cover

I simply bought a cheap notepad with thicker sheets in it as I don’t want markers to leave a stain on several pages. I covered the top with blue cardboard and stuck felt letters on it. (Actually, her first task was to stick letter E in the front. As you see it’s a little crooked 🙂  )

Some ideas are taken from Teaching 2 & 3 year olds
There are some drawing, sticking and tracing pages.

I also added pages like “Draw your Mommy” or ” Draw a picture of you”. But she hasn’t had any intention to look at those pages.

She was much more interested in the numbers and letters.

I was also influenced by Mama.Papa.Bubba blog journaling idea.

Aaaand (beat of a drum) her first drawing of a lovely weekend memory:

I wrote next to the drawing what she said was memorable for her. (Mommy and Daddy were made by me). I would have been so happy if she’d drawn  a picture of her name day party, but she refused. (although it was a wonderful party with 2 of her friends from the nursery, anyway…)

I really hope this will be a successful project in the long run and she’ll embrace this sort of memory collection. Fingers crossed. I’ll come back with some more feedback on journal writing.